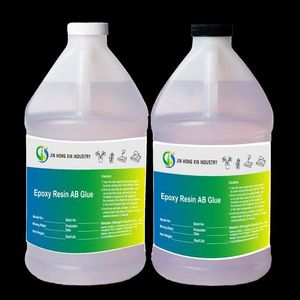
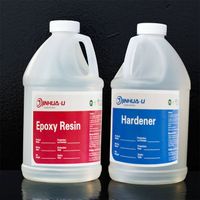
Easy Mix 1:1 Resin Epoxy Kit for Beginners Crystal Clear Casting and Coating Epoxy for Jewelry Making, Arts, Crafts
- $4.00 / 1 - 1999 kilograms
$3.98 / 2000 - 4999 kilograms
$3.78 / 5000 - 9999 kilograms
$3.50 / >=10000 kilograms - 1 kilogram
- Shenzhen Jinhongxin Industrial Co., Ltd.
- Guangdong, China
- Ms Lisa Xiao
PRODUCT DETAIL
| Viscosity: | Resin 1600cps Curing agent 100cps | Package preview: | |
| Supply capacity: | 10 tons per day | IF: | C15H16O2C2H7ONC3H5OCl |
| model: | JHX-318AB-1 | Material: | Epoxy resin + curing agent |
| Shelf life: | 12 months | EINECS number: | 230-391-5 |
| Classification: | other adhesives | color: | transparent |
| usage: | Construction, carpentry, deep pour epoxy | The mixing ratio: | A:B=2:1 or 3:1 |
| brand: | Jin Huaxing | Other names: | deep pour epoxy |
| payment terms: | L/C, T/T | type: | Silicone sealant |
| feature: | VOC free | Origin: | Guangdong, China |
| main ingreadient: | epoxy resin | CAS number: | 7085-85-0 |
Product Description

Unparalleled quality of liquid glass deep pour epoxy

Pour 2”- 4” more inches deep!
Not only can you pour the liquid glass deep pour epoxy thicker, 2-4 inches or more, but harder to protect it from damage,
More heat resistant, prevents warping, more stable, provides a solid structure and won't bend.
These attributes are what set Liquid Glass apart from the competition! You will find nothing clearer, harder or more
feasible!

Almost bubble-free crystal clear surface
Our Liquid Glass Deep Cast Epoxy Kit is a two part epoxy with thinner viscosity and bubble release properties,
Helps to give finished products a virtually bubble-free finish with unparalleled depth and clarity. liquid glass is
Formulated for all casting applications such as: River Tables, Void Filling Live-Edge Tables, Casting Art and Even
Small jewelry castings as small as 4ml! If you have a small project like a ring mold or jewelry, be sure to mix
than a pint at a time. If you are mixing less than a pint, it is easier to mix the incorrect volume, which is a common mistake,
cause curing problems.

High level of UV resistance
All epoxies will turn yellow over time. What sets our liquid glass deep cast epoxies apart is our specific advanced additives
formula. Our product yellows less and stays ultra crystal clear for longer than any of our competitors. our
Products built just for you are built to last like no other.
All epoxies will turn yellow over time. What sets our liquid glass deep cast epoxies apart is our specific advanced additives
formula. Our product yellows less and stays ultra crystal clear for longer than any of our competitors. our
Products built just for you are built to last like no other.


Easily Integrate Color
Great for accepting and dispersing mica powder paints, liquid paints, and alcohol inks and dyes! liquid glass is
Ideal epoxy for evenly distributing color and suspending inks and powders. *Paint, acrylic and oil based paints are not included
Recommended for use with epoxy resins, may have negative results.
Ideal epoxy for evenly distributing color and suspending inks and powders. *Paint, acrylic and oil based paints are not included
Recommended for use with epoxy resins, may have negative results.


Specification
Our 2:1 formula is easy to measure and even easier to pour!
user's guidance:
step 1:The ideal operating temperature is about 77°F. Best results are obtained in temperatures between 70°F and 85°F
Clean, dry and dust-free environment. Avoid working in high humidity. We recommend using the product on level and flat workpieces
surface.
Step 2:Measure the product for your intended use. Prepare 2 parts base resin and 1 part hardener by liquid volume.
First pour the hardener into a clean, smooth-sided container large enough to hold all the liquid, then pour the base resin into it.
Leave room for mixing.
Step 3:Materials must be thoroughly mixed for at least 6-8 minutes. Be sure to scrape the sides, bottom and corners of the container
when you mix. Be careful not to stir too much air into the mixture. If mixing a gallon, use an electric mixer set to "manual speed." for
For smaller quantities, use a stir stick. Do not mix more than one gallon. Pour into a new, clean container and blend for extra effect
minute.
Step 4:Pour the mixed resin over the surface and distribute evenly with a squeegee or gloved hands. continue pouring in the remaining
material to the desired thickness, allowing the resin to flow evenly over the sides of the project. Resin can be poured to
Each deposit is 2 inches thick, up to 4 inches depending on pour size.
Step 5:Use a heat source such as a heat gun to apply a small amount of heat to the surrounding area to remove air bubbles. this
Bubbles will rise to the surface and burst.
Step 6:If pouring a second time, it should still be a little sticky when poured the first time. After the second pouring is completed,
Air bubbles may need to be removed again. Material will feel hard after 48-72 hours, but fully cured and maximum hardness is ok
It takes up to 7 days, depending on temperature.
Pro tip:If you wish to apply paper decals or other objects under the surface of the JHX-318AB, these objects will need to be glued to
The surface is coated with JHX-318AB epoxy glue or craft glue. Some woods absorb material well in a single coat; however, many types
Wood requires a sealer to prevent air bubbles from rising through the wood and damaging the surface. older, porous parts
Wood may contain air and moisture that will stain the finish. In this case, the user can start with a very thin
Apply a coat of ultra-clear tabletop epoxy and allow to set before pouring a new layer.

main application | small table/bar top epoxy coating, jewelry, epoxy glass art project | Large table/bar top epoxy coating, jewelry, epoxy glass art project | Small deep pour, void fill, river table, live side table, foundry art, jewelry, serving board projects | Medium deep pouring, void filling, river tables, live side tables, foundry art, jewelry, serving board projects | Large deep pour, void fill, river table, live side table, foundry art, jewelry, serving board projects |
pouring depth | 1/4 inch | 1/4 inch | 2-4 inches | 2-4 inches | 2-4 inches |
Premium UV resistance | ✓ | ✓ | ✓ | ✓ | ✓ |
Unparalleled Clarity and Depth | ✓ | ✓ | ✓ | ✓ | ✓ |
gel time | 20-30 minutes, depending on mixing temperature and volume | 20-30 minutes, depending on mixing temperature and volume | 8-12, depending on temperature and mixing volume | 8-12, depending on temperature and mixing volume | 8-12, depending on temperature and mixing volume |
curing time | 24 hours | 24 hours | 36-72 hours, depending on mixing temperature and volume | 36-72 hours, depending on mixing temperature and volume | 36-72 hours, depending on mixing temperature and volume |
Demolding time | 12-14 hours | 12-14 hours | 36-48 hours, depending on mixing temperature and volume | 36-48 hours, depending on mixing temperature and volume | 36-48 hours, depending on mixing temperature and volume |
best working time | It is recommended to use after 24 hours of complete curing | It is recommended to use after 24 hours of complete curing | Recommended to use 72 hours after fully cured | Recommended to use 72 hours after fully cured | 72 hours after full cure is recommended |
VIEW MORE
YOU MAY LIKE


